
New Veggie Garden Irrigation
Hi folks! I am happy to introduce to you our gardens intern Oliver Bingham! Ollie is a recent graduate in Plant Science from University of Rhode Island. It’s been great having him on our team this summer!
He is doing a blog takeover this month and is here to talk to you about our new irrigation in the Vegetable Garden. So without further ado, here’s Ollie.
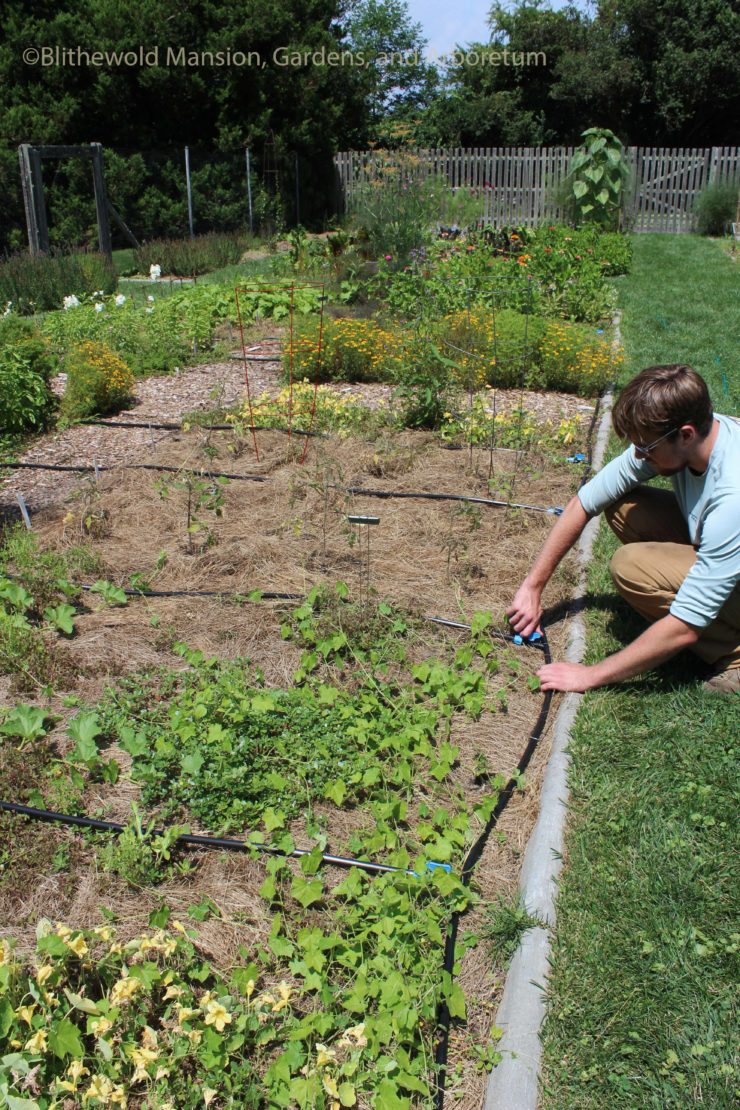
This has been a big year for Blithewold’s Vegetable Garden. We have been growing a plethora of different fruits and vegetables to supply the Kitchen at Blithewold, however, the latest development has been the installation of a drip irrigation system, the likes of which can be used in any garden, large or small, for crop production or ornamental maintenance. Of course, this year’s rain has meant we haven’t needed to use it much! Nevertheless, we are grateful to have it now, because all it takes are a few scorching hot days for an irrigation system to go from a want to a need. While there are many ways to begin a foray into the establishment of an irrigation system, we elected to begin with an irrigation kit that contains all of the parts needed to get started. We used the 1,000’ variant of “Johnny’s Drip Irrigation Kit” from Johnny’s Selected Seeds. Drip irrigation is a popular irrigation type for a few reasons, one of which being that it doesn’t waste water because the water is delivered to just above the root zone of the plant, and the flow rate is low enough that there is zero runoff. The low flow rate also means that we can leave the system on for longer, which means that more water is reaching further into the soil, which actually contributes to healthier and deeper rooting for our plants.
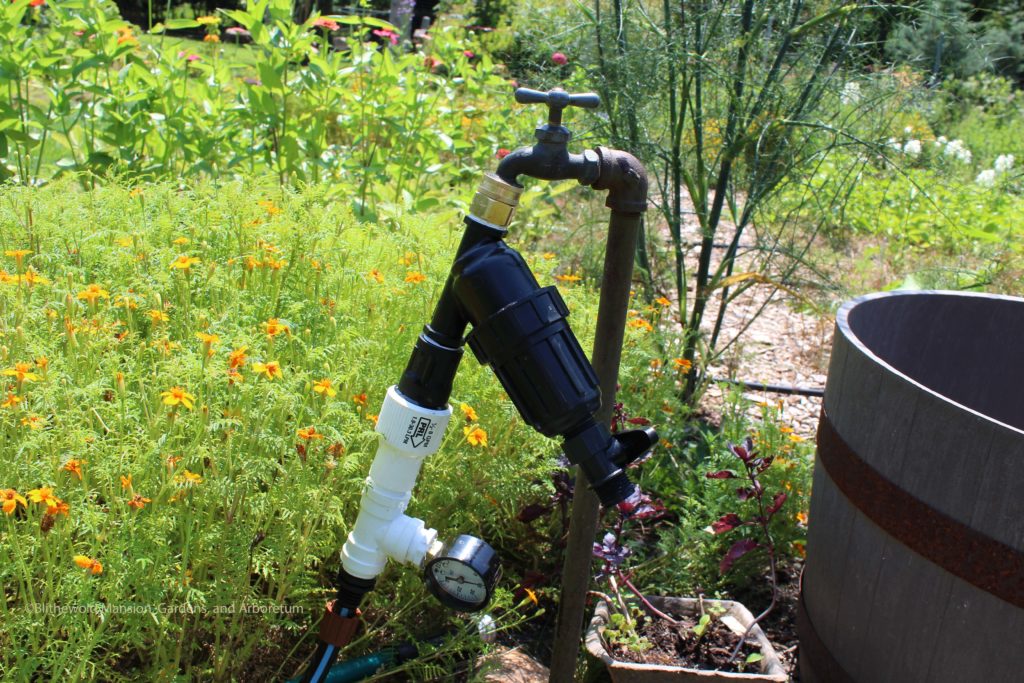
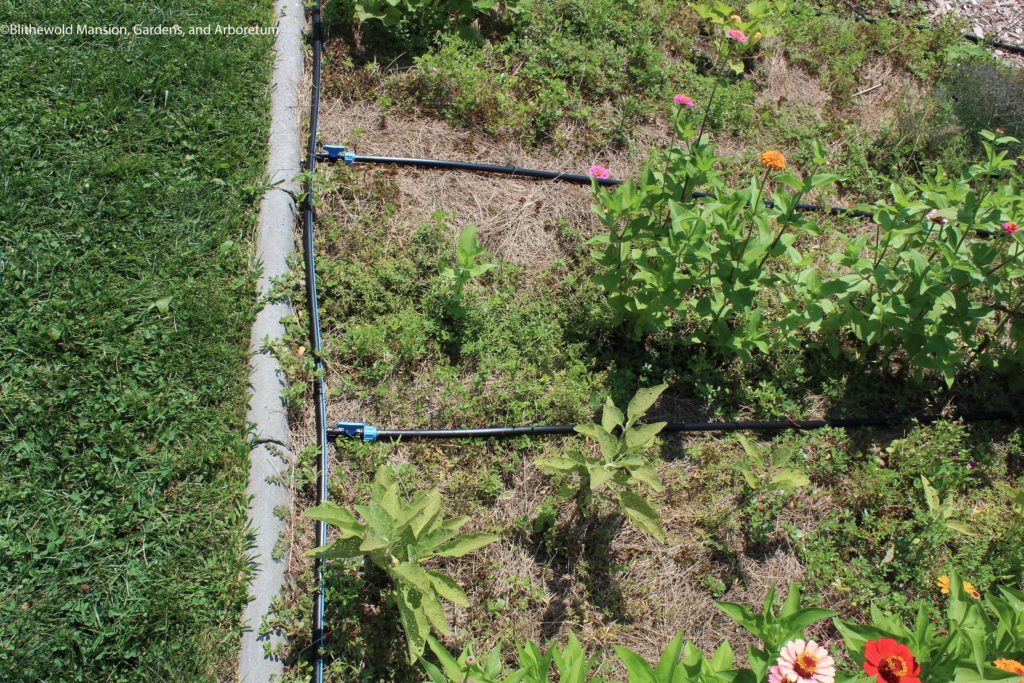
The first part that needed assembly was the filter. This requires the use of a teflon based tape (similar to that used when replacing a showerhead in a bathroom) to minimize leaks. Beyond the filter, the most intensive part of the setup is the placement of what is called the manifold, which is the central piece of ½” tubing that the drip tape will attach to. This needs to be oriented in such a way that all pieces of drip tape can be attached to it perpendicularly, as to minimize kinks and to ensure that all parts of the garden are adequately irrigated. At the Vegetable Garden, we found that we needed to snake our manifold around the edge of the beds so that every area could be irrigated. This meant that we needed to purchase additional tubing, however this would not be the case in most home applications.
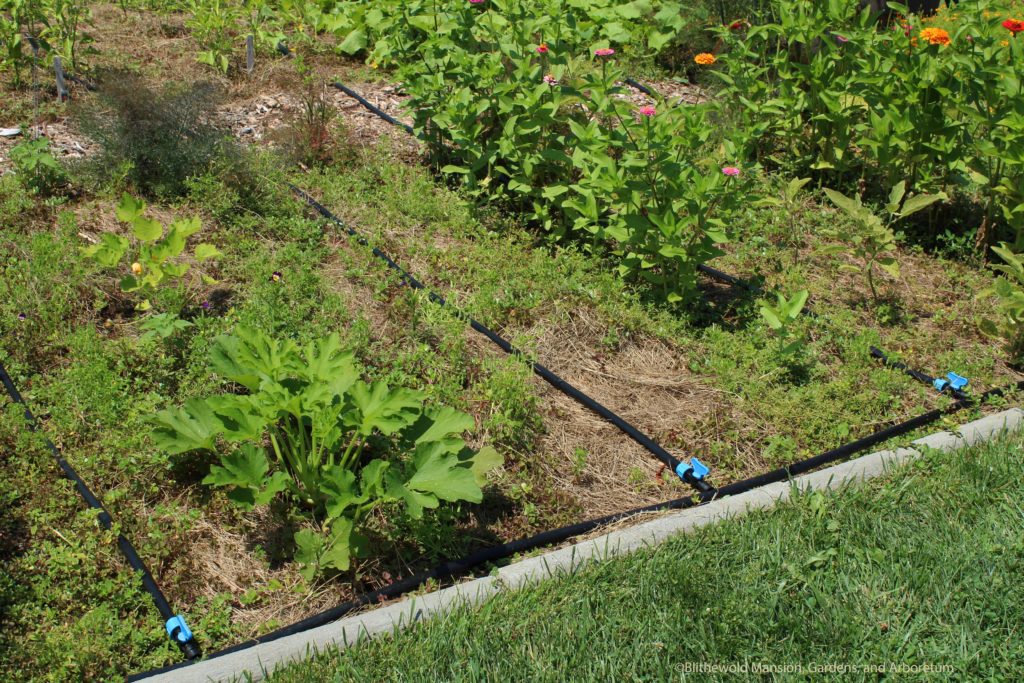
Now, in terms of laying out the drip tape, placement is key. Kits usually come with 500 or 1,000 feet of drip tape, and after figuring out which option is better for a given garden, the tape will need to be placed. The drip tape needs to be as close to the base of the desirable plants as possible, because we want to make sure that the correct plants are getting water, and we aren’t just providing water for a new patch of weeds! The rate of water coming out of the tape is very slow (the term drip is used literally), and thus once the tape is in place, the system needs to be allowed to run for anywhere from 3-6 hours. This may sound excessive, however because the flow rate from the tape is so low, some plants may experience stress if less time is allotted. Of course, every plant and certainly every garden is different, so it is up to the user to determine exactly how long they need to run their system.

Drip irrigation has proven to be a minimally intensive method of managing soil moisture in the Blithewold Vegetable Garden. Happy gardening!